Tf2.X安装指南
下载Anaconda
从清华源下载 Anaconda
下载地址,选择自己系统的新版下载。
下载完成后一路next 在这个位置需要添加环境变量,便于以后从cmd访问conda
选Add Anaconda to my PATH environment variable
安装结束后重启计算机
配置Anaconda
win+R键,然后输入cmd并回车 在命令行输入
更新conda源
conda config --set show_channel_urls yes
退出cmd,用记事本打开C:\Users\@@@.condarc@@@为你的用户名(这个文件默认是隐藏的),使用以下内容替换.condarc的内容:
1 | channels: |
保存退出,再次打开cmd
pip install pip -U
更换清华源
pip config set global.index-url https://pypi.tuna.tsinghua.edu.cn/simple
创建开发环境
conda create -n tf2.0 python=3.6
进入创建的开发环境
conda activate tf2.0
安装tensorflow GPU版本
pip install tensorflow-gpu
测试tensorflow-gpu版本是否安装成功
pip install ipython ipython
在In[1]:中输入iimport tensorflow as tf回车,没有报错即为成功 在
In[2]:中输入 tf.__version__ 回车,显示2.*即为成功 在
In[3]:中输入tf.test.is_gpu_available()回车,输出TRUE即为成功
安装PyCharm运行tensorflow
百度自行下载PyCharm并破解
配置PyCharm与TensorFlow
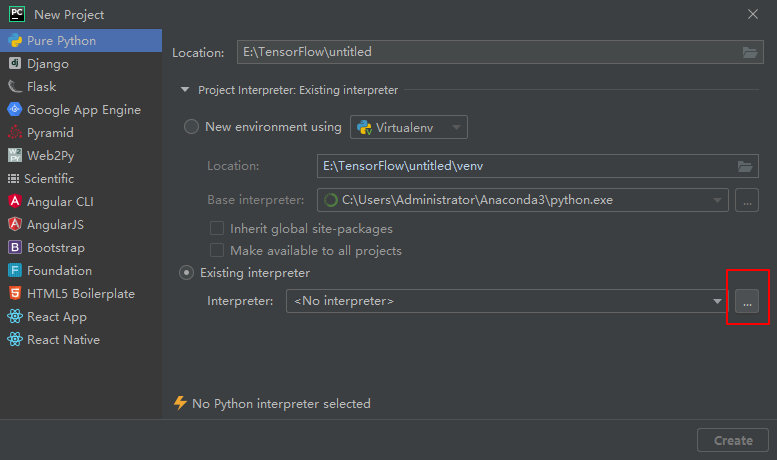
打开pycahrm,进行新建项目的一些设置 出现如下界面
选择运行环境。选中Existing Interpreter,点击右边设置按钮,选择Add Local

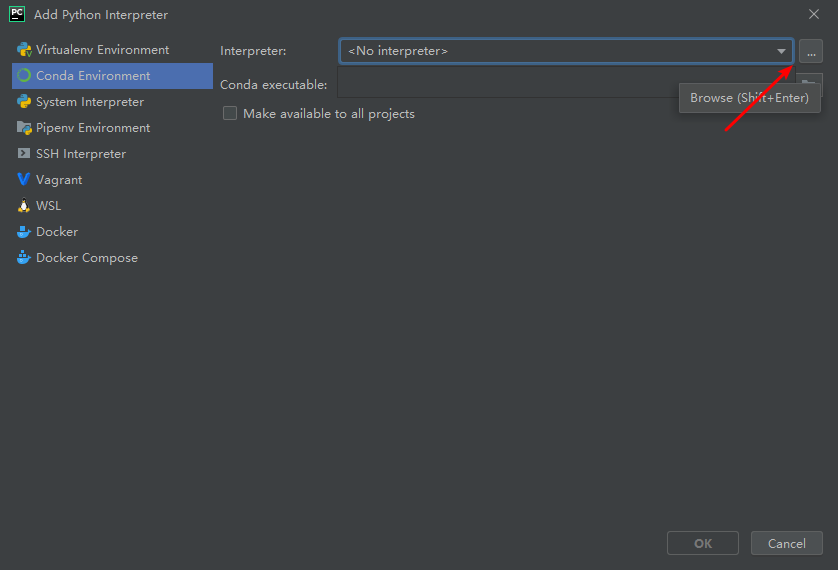
点击Conda Enviroment,选择环境

进入Anaconda安装路径,选择envs文件夹,里面有建立的环境,选择之前建立的tensorflow环境中的python.exe
test.py文件测试tensorflow
这是一个简单利用MNIST数据集构建网络运行的小程序,程序会自动从网上下载MNIST数据集并进行训练
1 | from __future__ import absolute_import, division, print_function, unicode_literals |


